 Not quite as straight forward as on the Fender model as new screw holes have to be drilled.
Many thanks to Chris Mann for this detailed description and photo set of switching the stock bridge for one of our Hardtail Hipshot style bridges.
SQUIER CABRONITA TELECASTER – BRIDGE SWAP
Here’s a step-by-step on how to remove the standard bridge on a Squier Cabronita Telecaster and install a Hardtail Hipshot style bridge from www.axecaster.co.uk instead
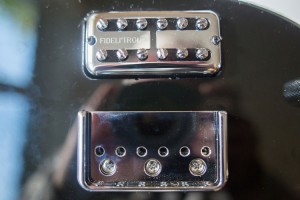
 Here’s the Hipshot bridge alongside the original. It’s pretty much the same size, but has three fixing holes under the saddles instead of the five arranged around the edges on the original bridge.
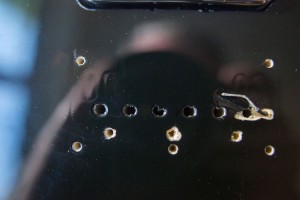
After removing the strings and unscrewing the original bridge, we can see the string-through-body holes and the earthing wire that sits under the bridge.
 Lining up the new bridge over the string-through holes we can see that the new bridge covers the old screw holes quite neatly; there is just enough room for a new screw hole to be drilled for the centre fixing between the old middle screw hole and the string-through holes. I removed the saddles to make it easier to align the new bridge with the string-through holes and mark the positions for drilling the new screw-holes.
Drop the old fixing screws into the string-through holes to help keep the new bridge aligned while you mark the body through the three new fixing holes.
Find a drill-bit of a suitable size to match the shank of the fixing screw. Mine was a 1/8th inch bit I think, but check it against the screw. If it’s too big the screw will slop around in the hole, too small and it will bind up when you screw it in.
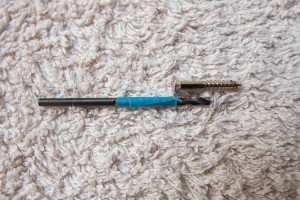
Wrap some masking tape around the bit as shown to act as a guide so that you drill into the guitar body only far enough to make a hole for the plain shank of the screw, leaving the threaded section to cut it’s own hole in the wood:
Now drill your three holes keeping the drill as close to vertical as possible:
Inevitably some of the poly coat chipped off as I was drilling the middle hole but it will be concealed by the new bridge when fitted.
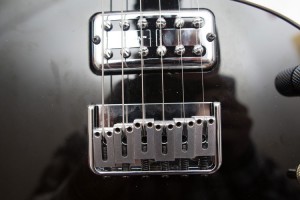
Now we can screw the new bridge into place: And finally we can refit the saddles and string up the guitar!
The only possible snag I found is that it seems as if the intonation adjustment for the low E string has to be wound all the way towards the bridge – I had to take the spring off to get it far enough out – but I am no guitar tech so I may not have it adjusted properly. The bridge seems to be in the same relative position as the old one so I’m not sure why this is. I did change the strings from the stock Fender ones to Elixir Nanowebs (still 9s) so that may have something to do with it.


Comments